
5.7 – SSH authentication with keys
To be able to authenticate to a created target system via SSH using public and private keys, the following steps must be followed, which will be described in more detail later:
- Generate an SSH key
- Copy the key to a server
- Test the key
- Optional: convert private key to .pem format
- Include the key in SparkView
1. Generate an SSH key
With OpenSSH, an SSH key is created using ssh-keygen. In the simplest form, just run ssh-keygen and answer the questions. The following example illustates this.
# ssh-keygen
Generating public/private rsa key pair.
Enter file in which to save the key (/home/sparkview/.ssh/id_rsa): mykey
Enter passphrase (empty for no passphrase):
Enter same passphrase again:
Your identification has been saved in mykey.
Your public key has been saved in mykey.pub.
The key fingerprint is: SHA256:GKW7yzA1J1qkr1Cr9MhUwAbHbF2NrIPEgZXeOUOz3Us sparkview@demo
The key's randomart image is:
+---[RSA 2048]----+
|.*++ o.o.        |
|.+B + oo.        |
| +++ *+.         |
| .o.Oo.+E        |
|    ++B.S.       |
|   o * =.        |
|  + = o          |
| + = = .         |
|  + o o          |
+----[SHA256]-----+ #
Creating a key pair (public key and private key) only takes a minute. The key files are usually stored in the ~/.ssh directory.
2. Copy the key to a server
Once an SSH key has been created, the ssh-copy-id command can be used to install it as an authorized key on the server. Once the key has been authorized for SSH, it grants access to the server without a password.
Use a command like the following to copy SSH key:ssh-copy-id -i ~/.ssh/mykey user@host
This logs into the server host, and copies keys to the server, and configures them to grant access by adding them to the authorized_keys file. The copying may ask for a password or other authentication for the server.
Only the public key is copied to the server. The private key should never be copied to another machine.
3. Test the key
Once the key has been copied, it is best to test it:
ssh -i ~/.ssh/mykey user@host
The login should now complete without asking for a password. Note, however, that the command might ask for the passphrase you specified for the key.
4. Optional: convert private key to .pem format
If you do not have the private key in pem format and/or SparkView shows an error message like the following ...
SEVERE: Invalid PEM structure, '-----BEGIN...' missing

java.io.IOException: Invalid PEM structure, '-----BEGIN...' missing
	at com.trilead.ssh2.crypto.PEMDecoder.parsePEM(SourceFile:183)
	at com.trilead.ssh2.crypto.PEMDecoder.decode(SourceFile:429)
	at com.trilead.ssh2.auth.AuthenticationManager.authenticatePublicKey(SourceFile:175)
	at com.trilead.ssh2.Connection.authenticateWithPublicKey(SourceFile:335)
	at com.trilead.ssh2.Connection.authenticateWithPublicKey(SourceFile:428)
	at com.toremote.websocket.ssh.SSHWrapper.connect(SourceFile:109)
	at com.toremote.websocket.ssh.SSHRunner.run(SourceFile:165)
... you should convert the private key to the correct format. To do this, you can run the following command:
ssh-keygen -f mykey -m pem -p && cat mykey > mykey.pem
You may need to re-enter the passphrase for the key. The command creates a pem version of the private key and then copies it to a key file named "mykey.pem".
5. Include the key in SparkView
To finally use the key with SparkView, copy the previously created file "mykey.pem" into the root directory of SparkView. Then you enter the location of the key in the server configuration:
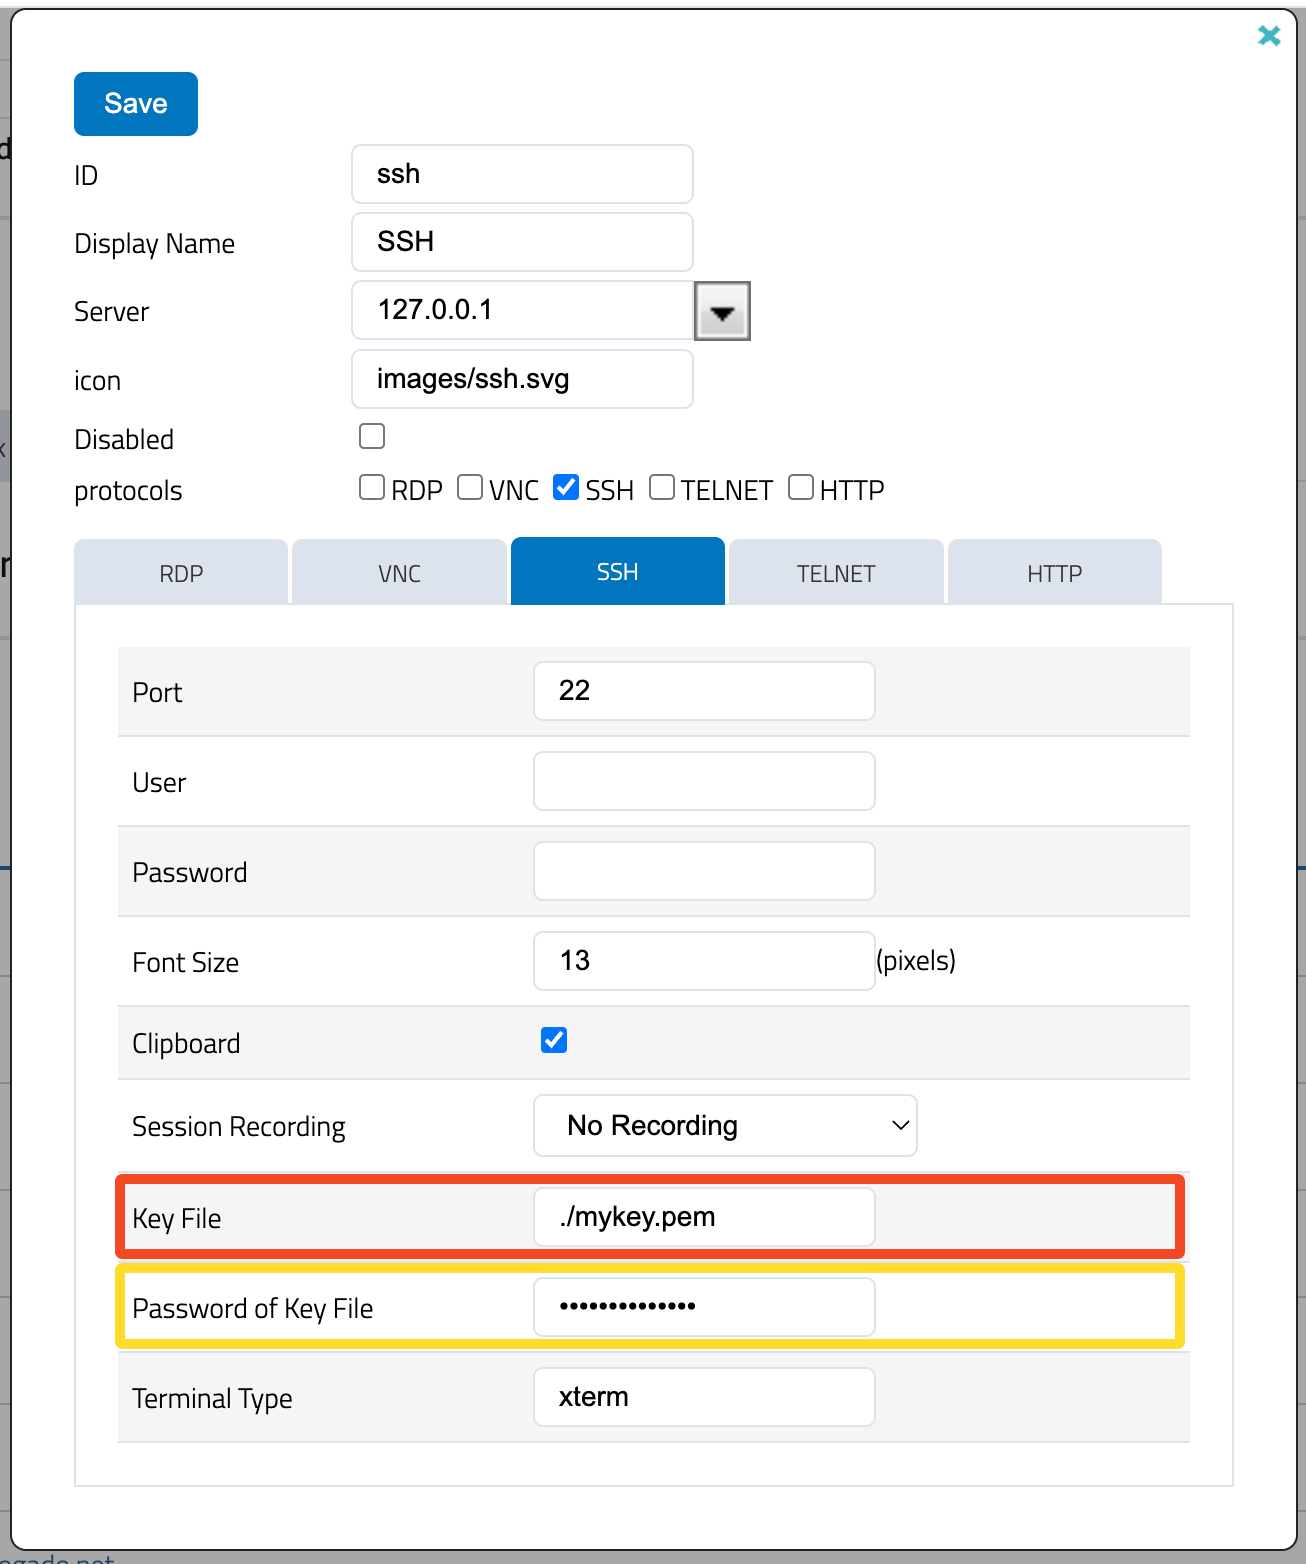
When you connect to the server afterwards, you only need to enter the SSH username and the connection will be authenticated and established automatically. Alternatively, you can forward the credentials from the user, but the SparkView user name and the SSH user name must be the same.