
2.2 – Install as a Windows service
Download SparkView installer for Windows from:
https://cloud.beyondssl.com/url/sparkviewwindows
Install SparkView according the instructions of installer. During the installation, you can choose the JRE/JDK you want user if you have multiple JRE/JDK installed. You can also choose the gateway listening port (default is 8080).
If you get the “This app can’t run on your PC” error, you may need to disable Smartscreen functionality and under Windows Updates – Developers: Allow Sideloads Apps.
If you have an IIS instance running on the same machine and you want SparkView listening on port 80 or 443, you must ensure that IIS is not bound to the IP address and port you want to use for the SparkView service. You must set the bindings in the IIS Manager. However, it may also be necessary to change the HTTP service which by default listens on port 80 for all IP addresses. To do this you can use netsh http add iplisten ipaddress=xxx.xxx.xxx.xxx to instruct the HTTP service to listen on IP addresses not used by the
SparkGateway. Then you can use port 80 on the unused IP Addresses with the SparkGateway.
Change the name of your license file to “license” and copy it to installation directory if you are using the full version. You don’t need a license file for the evaluation version.
You can start the “Welcome” page to connect to a computer or “Configuration” page from the start menu when installation is done.
Add SparkGateway.exe to your firewall exception list.
Make sure you allocate more memory to SparkGateway (in SparkGateway Manger, "Java" tab) if you have more users:
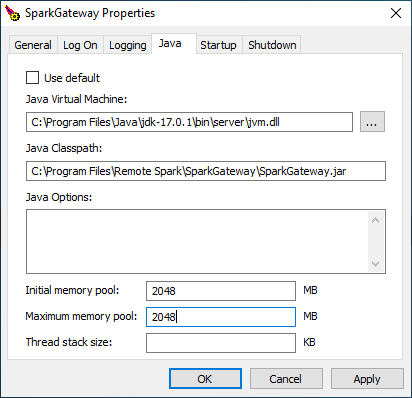
We are using Apache Procrun as a Windows service wrapper, for more information, please check http://commons.apache.org/daemon/procrun.html