Configure SAML authentication and authorization on SparkView
SparkView supports user authentication and authorization through SAML 2.0 (https://en.wikipedia.org/wiki/SAML_2.0).
To support SAML, the gateway needs the following configurations:
- Servers.json file, which contains the list of servers and / or remote applications (see gateway manual for details)
- Users.json file, which contains the user(s) and the servers he/she is able to access. In this file, the name attribute is the email of the user set on the IDP server. For example:
{ "users": [ { "name": "remotesparktest@gmail.com", //the email of the user existing on IDP "password": "password", "servers": [ "Win7_RDP", //The server name(s) existing in the Servers.json "Win10_RDP" "Ubuntu_xRDP" ], "isDomainUser": false }, … ] } - SAML Identity Provider (IdP) XML Metadata, which is a file generated by the IDP server. This XML based file contains configuration and integration details for SAML2.0 Single Sign-on (SSO).
- SAML Service Provider (SP) XML Metadata, which is a file created with the gateway information.
- In the gateway config file (gateway.conf), add the following mandatory section at the bottom:
# SAML configuration
samlIdpMetadataFile=[full path to the IDP metadata xml file]
samlSpMetadataFile=[full path to the SP metadata xml file]

For example, in the gateway.conf, add the two lines below:
samlIdpMetadataFile=C:\\SparkGateway\\ssocircle_idp.xml
samlSpMetadataFile=C:\\SparkGateway\\sparkgateway_sp.xml
In addition to the configuration on the gateway, when a new Service Provider Metadata is imported against a given user, make sure the attribute “EmailAddress” to be sent in the SAML assertion. (See the sample below).
A step-by-step instruction of configuring SAML on the gateway using a public IDP provided by SSOcircle:
Build a new user on IDP and log in.
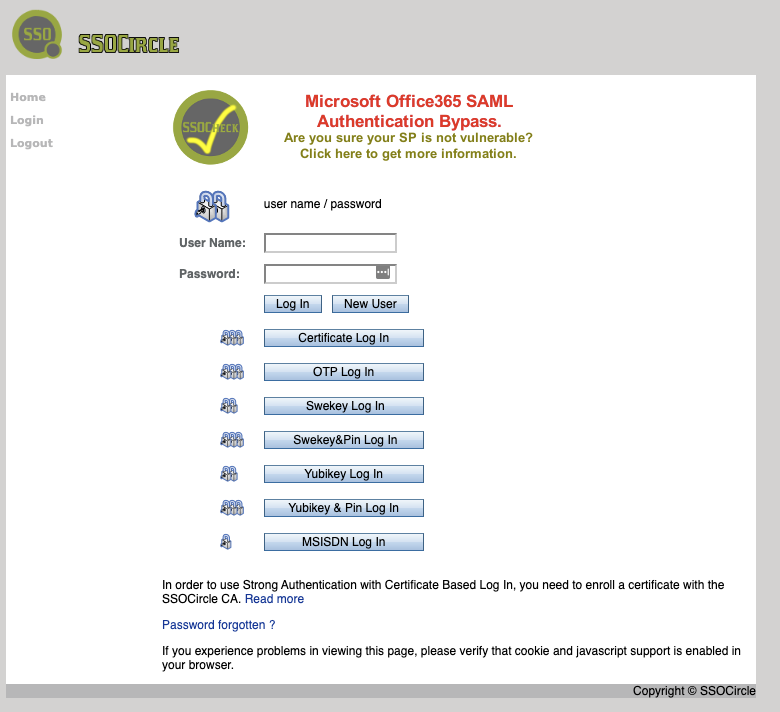
- Go to https://idp.ssocircle.com/sso/UI/Login to load the page below. Click “New User” button to create a new user.
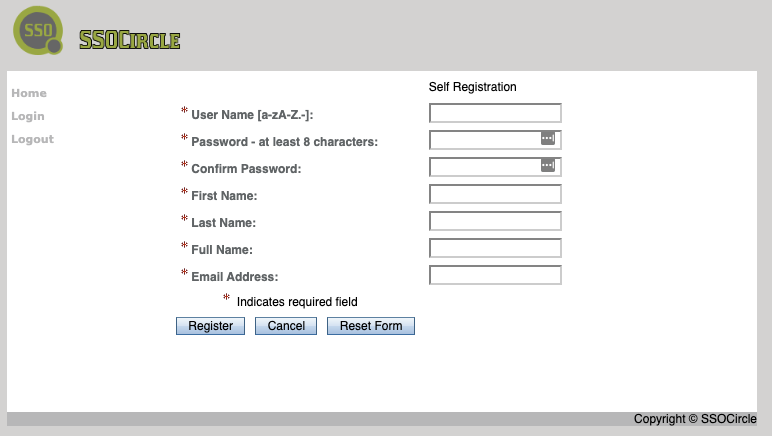
- On the next page, input “User Name”, “Password”, “First Name”, “Last Name”, “Full Name” and “Email Address”, and click “Register” button to create a new user on IDP.
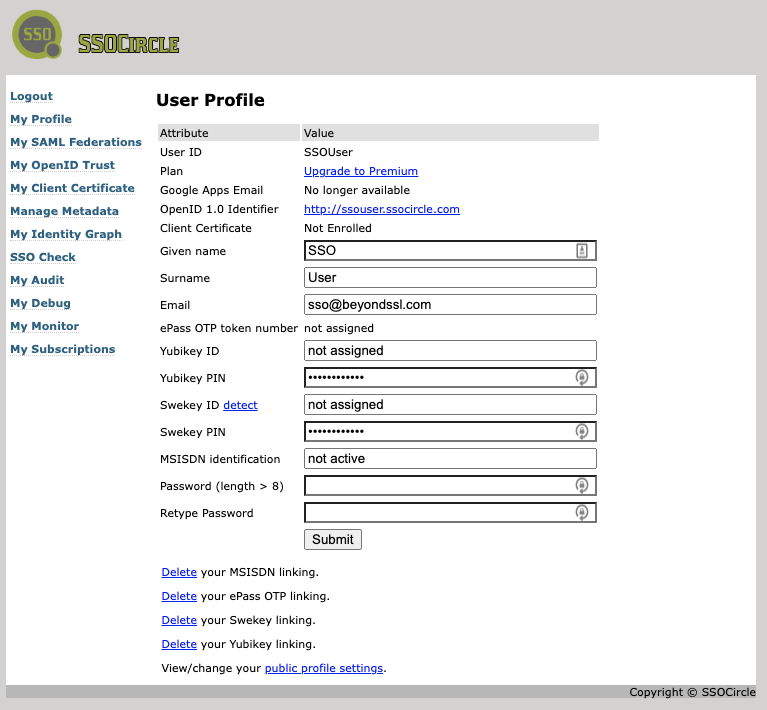
- Log in with the newly created user with the name and password. A user profile page shows up as:


Create the Service Provider (SP) XML metadata, if you do not have one already. If you have SP metadata XML file already, go to "Add new Service Provider (SP)".
- In above user profile page, click the “Manage Metadata” button on the left side menu bar. The existing SP entity shows up, if there is any.
- If the existing one has expired, remove it by pressing “Remove Metadata” button.
- Click “Add new Service Provider” link to load the page which imports SP metadata.
- Press the link “you can build it here”. The template of SP metadata is shown in a new page.
- Input entity ID with “sparkgateway” and ACS URL with “http://[gateway_host_name]/samlcallback”.
The entity ID is the identification of the service provider; and the ACS URL is the saml callback URL. After clicking the “insert” button, you will see the updated SP metadata in the text area in red, with the information of entity ID and callback url inserted.
For example, it can look like:<?xml version="1.0" encoding="UTF-8" standalone="yes"?> <EntityDescriptor entityID="sparkgateway"xmlns="urn:oasis:names:tc:SAML:2.0:metadata"> <SPSSODescriptor AuthnRequestsSigned="false" WantAssertionsSigned="true" protocolSupportEnumeration="urn:oasis:names:tc:SAML:2.0:protocol"> <NameIDFormat>urn:oasis:names:tc:SAML:1.1:nameidformat:unspecified</NameIDFormat> <AssertionConsumerService index="0" isDefault="true" Binding="urn:oasis:names:tc:SAML:2.0:bindings:HTTP-POST" Location="http://sparkgateway1/samlcallback"/> </SPSSODescriptor> </EntityDescriptor> - Copy the content and save it as a local XML file, such as “c:\SparkGateway\sparkgateway_sp.xml”. This is the SP XML metadata file of the gateway.
Add new Service Provider (SP).
- Click the “Manage Metadata” button on the left side menu bar. The existing SP entity shows up, if it is added.
- Click “Add new Service Provider” link to load the page which imports SP metadata.
- Input the host name of the gateway in the FQDN field.
- Check the “EmailAddress” checkbox to include the “EmailAddress” attribute in the SAML assertion response.
- Paste the SP XML Metadata in the text area. This is the XML content generated in above step.
- Finally, click “Submit” to add this Service Provider (sparkgateway) to the user.
Get the public IDP XML metadata.
- Click the “Manage Metadata” button on the left side menu bar. The existing SP entity shows up, if it is added.
- Right click the link “SSOCircle Public IDP Metadata” and select “Save link as …” to save the XML in local, such as “c:\SparkGateway\ssocircle_idp.xml”. This is the IDP XML metadata file.
Specify the IDP XML Metadata file and SP XML Metadata file on the gateway.
Edit the gateway.conf by adding the following two lines at the end:
samlIdpMetadataFile=C:\\ SparkGateway\\ssocircle_idp.xml
samlSpMetadataFile=C:\\ SparkGateway\\sparkgateway_sp.xml
Start gateway, and load the login page http://[your_gateway_hostname]/login.html in a browser.
Click the red icon “SAML” to do user authentication and authorization on the SSOcircle public IDP.
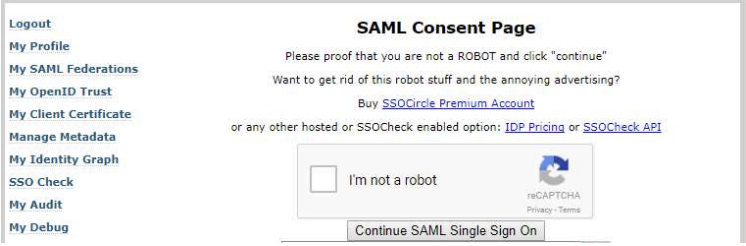
- If you have logged in the SSOCircle web page as above, you should see:

Click “I’m not a robot”, and then “Continue SAML Single Sign On” button to get the user’s email and password from the IDP. The user’s email will be filled in the user name field in the login.html.
Click “Sign in” button, you will see the icons of all servers which were assigned in the users.json file. - If you have not logged in SSOCircle web page, after clicking the red icon “SAML”, you should be redirect to the IDP login page. After logging in and checking “I’m not a robot” as above step, you can also see the icons of your servers.