3.13 – Native RDP shadowing (join any active RDP sessions)
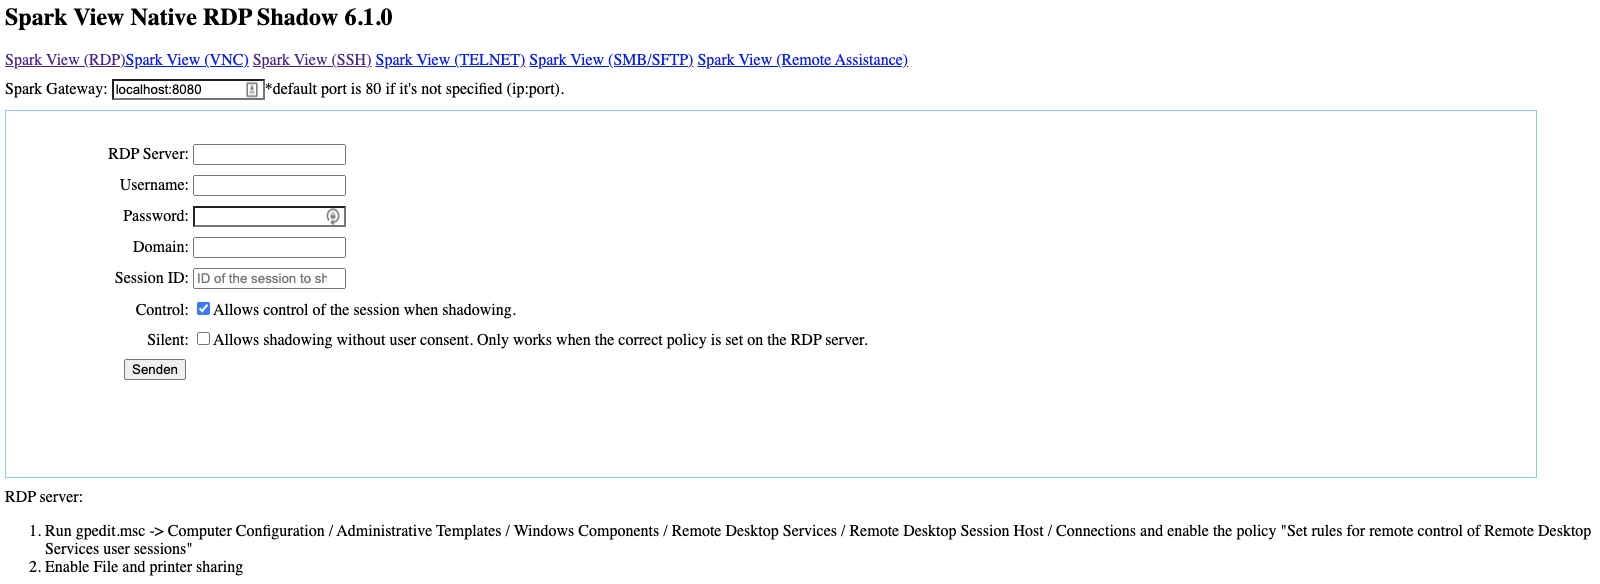
Since 6.0, Spark View can use shadow.html to shadow any active RDP sessions on the RDP server, even they are connected from another RDP client, which is same as the mstsc.exe /v:server /shadow:x /control.
Remote shadowing setting is configured using a Group Policy or by registry modification. You can configure whether you need to request the user confirmation to connect, and whether view or control is allowed in the shadow session.
Target RDP server requirements:
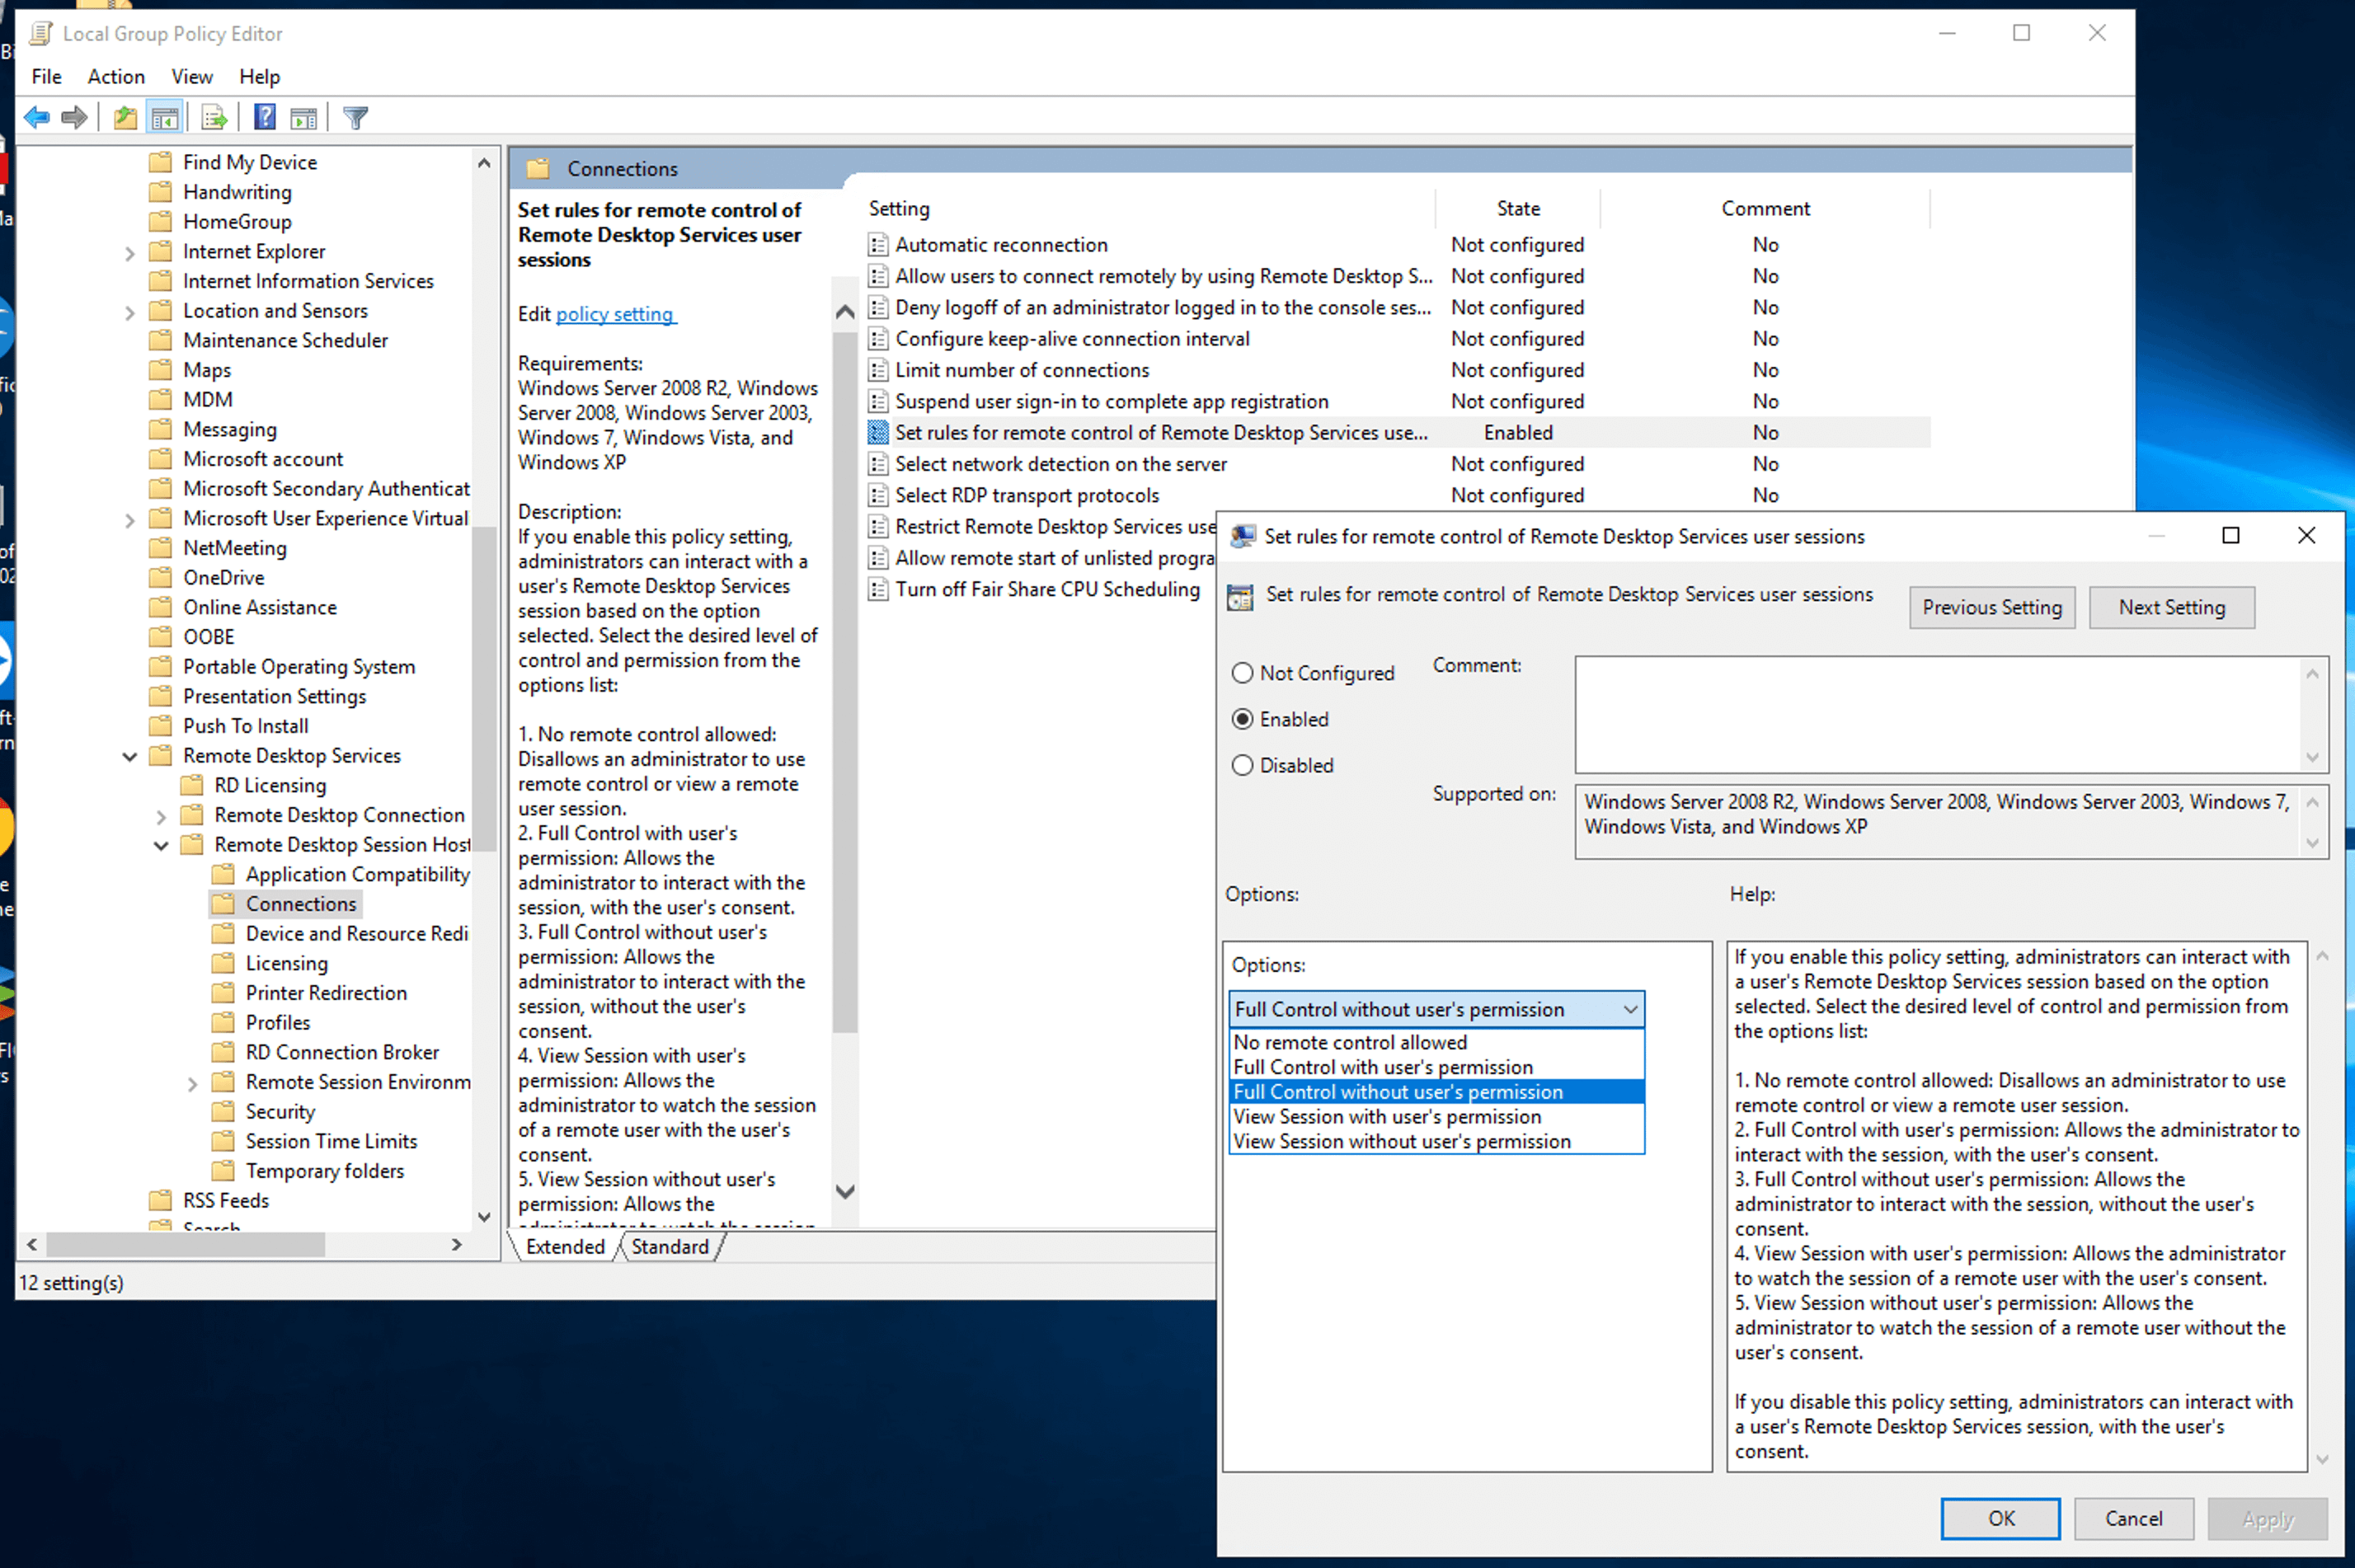
- Enable remote control: Run gpedit.msc -> Computer Configuration / Administrative Templates / Windows Components / Remote Desktop Services / Remote Desktop Session Host / Connections and enable the policy "Set rules for remote control of Remote Desktop Services user sessions"

Instead of enabling the policy, you can set the necessary value in the DWORD registry parameter Shadow in the HKLM\SOFTWARE\Policies\Microsoft\Windows NT\Terminal Services registry key. The allowed values are:
0 – disable remote control;
1 — full control with user’s permission;
2 — full control without user’s permission;
3 — view session with user’s permission;
4 — view session without user’s permission.
By default, this registry parameter is not set and the shadow connection is performed in full control mode with user permissions. - Enable file and printer sharing
- Enable native RDP session shadowing ("nativeShadowing = true" in gateway.conf)
- Make sure that SMB port 445 is open in the firewall and the RDP server
Add rule to allow traffic to SMB/CIFS and RPC
To add a firewall rule to allow TCP/445 (SMB/CIFS) and TCP/135 (RPC):
- Go to Computer Configuration > Policies > Windows Settings > Security Settings > Windows Firewall with Advanced Security > Windows Firewall with Advanced Security - LDAP > Inbound Rules
- Right-click and choose "New Rule"
- Choose Port and click "Next"
- Choose TCP and at specific local ports enter 445, then click "Next"
- Select "Allow the connection" and click "Next"
- Choose Domain (or other, depending on your knowledge), then click "Next"
- Specify SparkView as the name and click "Finish"
https://sparkview-server/shadow.html
Session shadowing
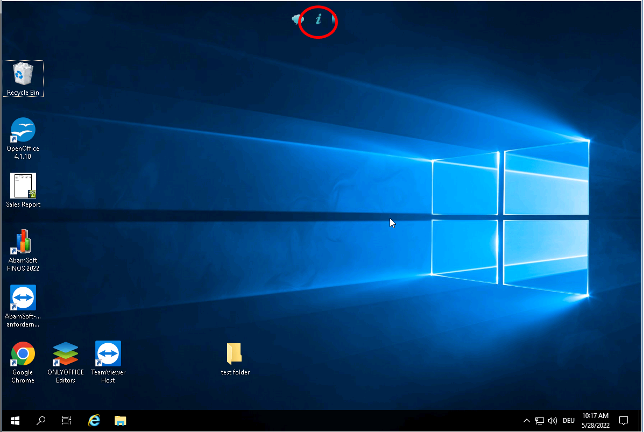
As an user, click the "i" symbol on your desktop:

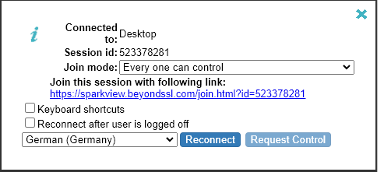
You will see an info window with a session ID, a join mode and a session link:

Send this link or the session ID to your Administrator who will join your session for help by using this ID:


