# 5. – Further management and configuration
# 5.1 – Session management
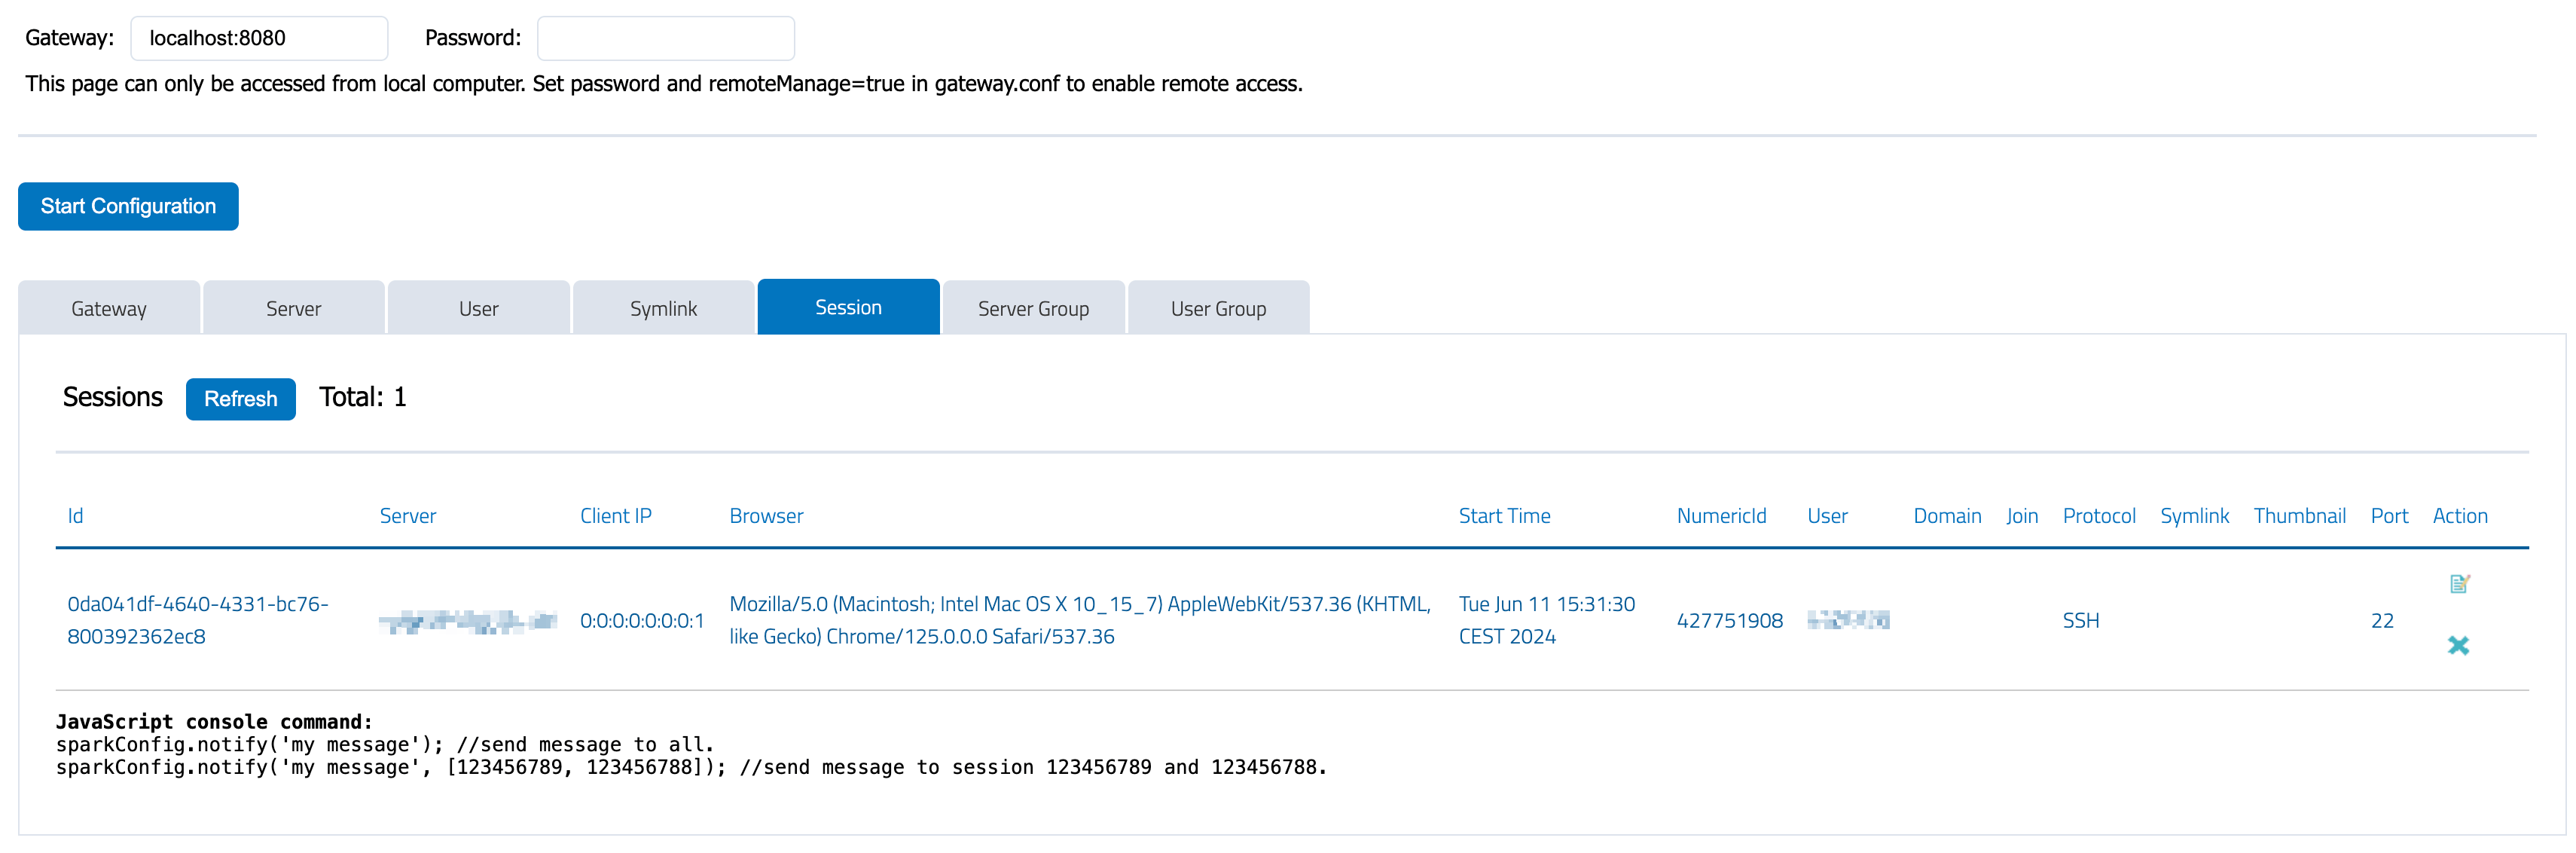
You can use config.html to check session status, terminate or join a session on the gateway:
[](https://docs.sparkview.info/uploads/images/gallery/2024-06/scr-20240611-nsyf.png)
# 5.2 – Multi-Monitor
You’ll have to open a new browser window for every monitor because you can not span a full screen browser window on multi monitors.
1. Go to the "Multi-Monitor" tab, click "Open" to open a new browser window
2. Move the new window to the second screen and make it full screen.
3. Make the current browser window full screen and connect.
# 5.3 – SMB2 and SFTB file proxy
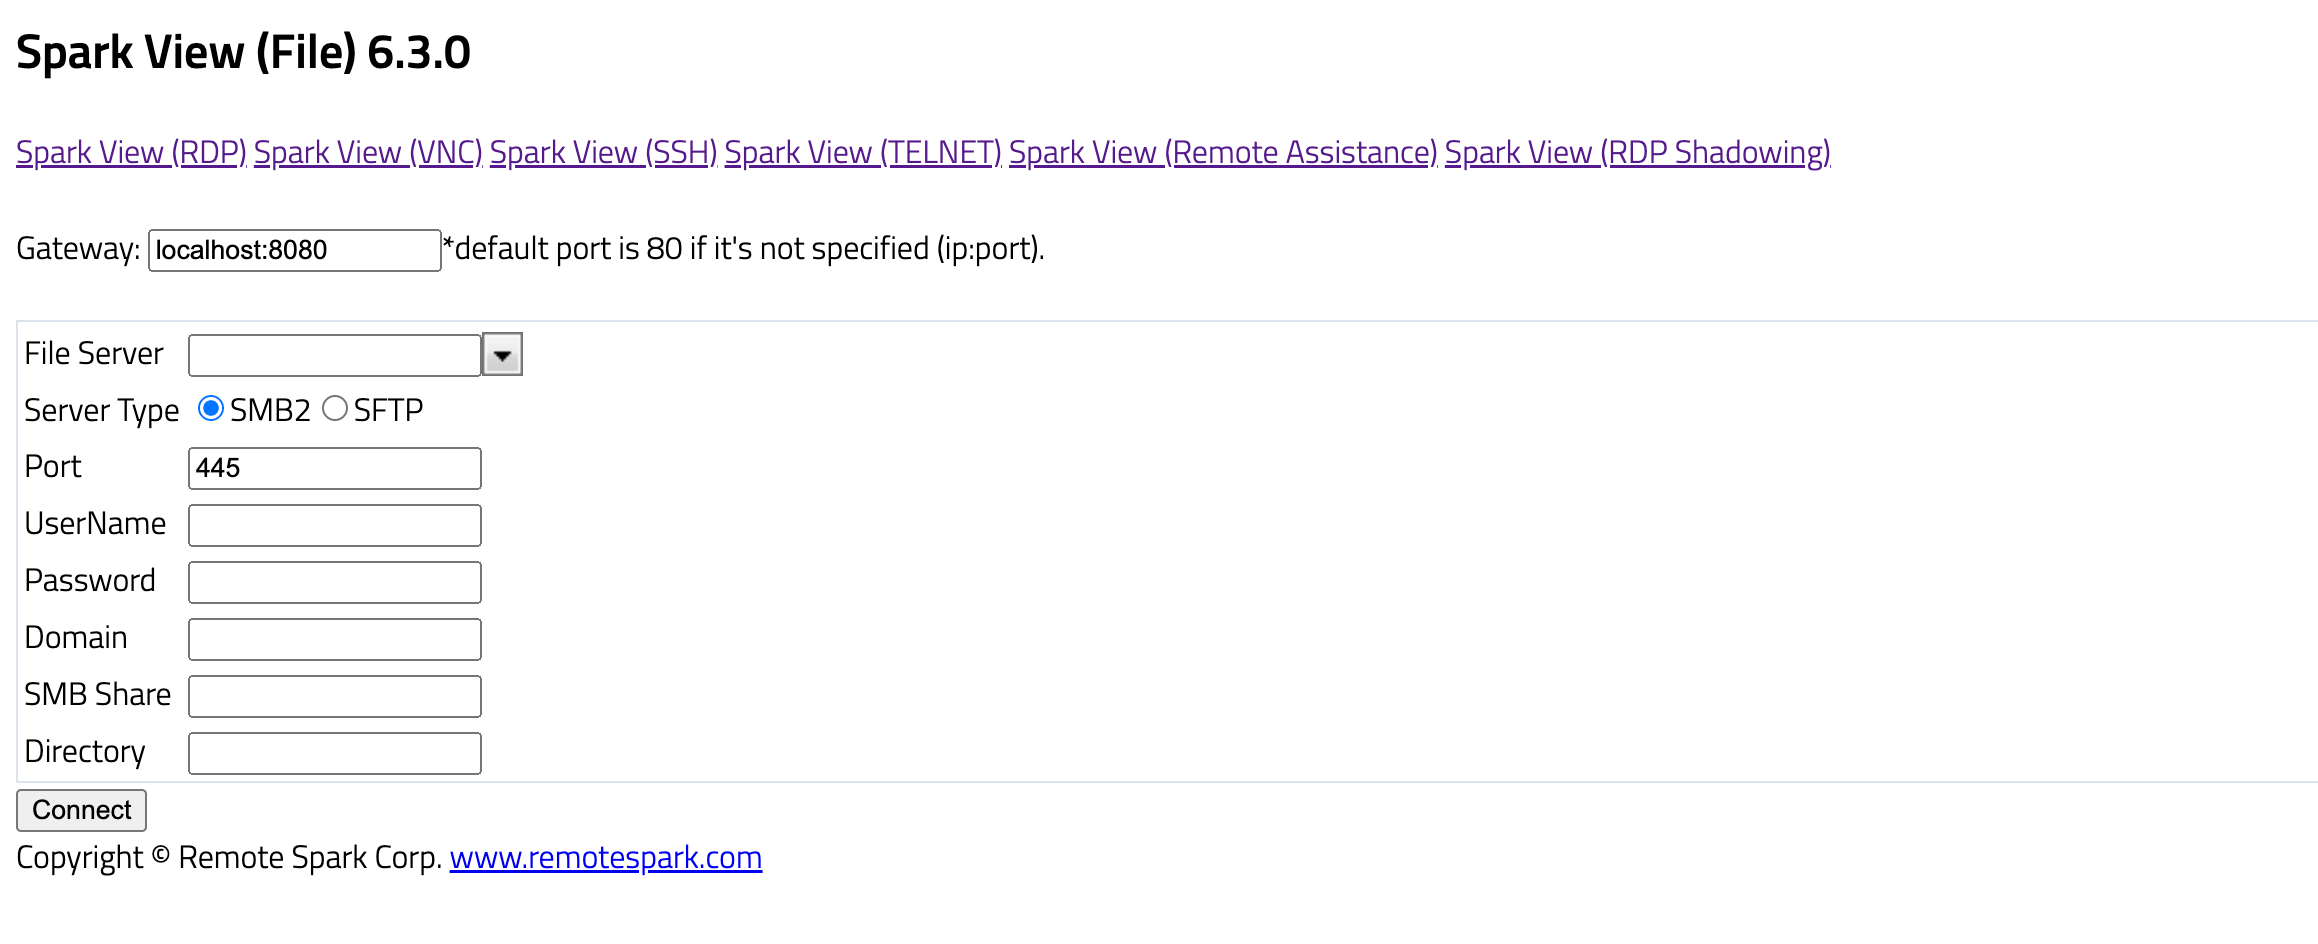
Spark Gateway can also act as a SMB2/SFTP file proxy. User can access their SMB share, SFTB files with file.html with the following advantages:
- No need to expose your SMB, SFTB server.
- Protected with TLS encryption.
- No need to expose RPC, pipe access with SMB.
- Easily integration file access with our HTML5 interface and library.
[](https://docs.sparkview.info/uploads/images/gallery/2024-06/bildschirmfoto-2024-06-11-um-15-35-54.png)
# 5.4 – Deploy, run and test applications in the cloud
Deploy and test your application in cloud can cumbersome. You need:
- Create bastion for individual work stream or project.
- Manage a lot of bastion hosts and user account is really painful.
- Security is always a problem for those bastion hosts.
Take advantage of our Spark Gateway proxy, SSH and SFTP feature. We developed a native agent which will work with the gateway to make this a lot easier. Please check our [Deploy applications in cloud with SparkView](https://docs.sparkview.info/books/sparkview-deploy-applications-in-the-cloud).
# 5.5 – IP filter (iptables)
You can set up IP filters for SparkView.
First, save you ip filters into a JSON file. Here is the format of the IP filter configuration file:
```
{
"zoneRules": {
"HTTP_API": {
"allow": true,
"ranges": [
{
"from": "192.168.12.100",
"to": "192.168.12.200"
},
{
"from": "169.254.84.132"
}
]
},
"TCP": {
"allow": true,
"ranges": [
{
"from": "192.168.12.100",
"to": "192.168.12.200"
},
{
"from": "192.168.12.10",
"to": "192.168.12.20"
},
{
"from": "169.254.84.132"
}
]
}
}
}
```
Then, you need to specify the location of this file in gateway.conf:
`iptables=C:\\workspace\\data\\iptables.json`
There are 3 zones available in SparkView:
- "TCP" is used to control TCP connections
- "HTTP_API" is used to control the HTTP API usage
- "CONFIG" is used to control the config.html
Rules for accessing config.html:
1. Always accessible from the localhost
2. Accessible from anywhere if `remoteManage=true` in gateway.conf and correct password is provided
3. Accessible if `remoteManage=false` and source IP is allowed in iptables
# 5.6 – SNMP integration
Configuration in gateway.conf:
```
# Agent address and port
snmp.address.get-set = udp:192.168.1.68/1161
snmp.mib.prop.file = /SparkGateway/snmp/snmp-agent-mib.properties
snmp.table.size.limits.prop.file = /SparkGateway/snmp/snmp-agent-table-size-limits.properties
# Percentage of license usage to trigger alert
snmp.license.usage.warning.percentage = 0.5
```
The `snmp.address.get-set` specifies the IP address and port of the SNMP server (SNMP manager).\
UDP ports 161 and 162 are the default for SNMP requests and traps.
The `snmp.license.usage.warning.percentage` defines the license usage threshold at which a trap will be sent to the SNMP manager.
All MIB files are stored in the `installDir\snmp` directory, including:
- **gateway-alert-mib**\
Includes objects such as `gatewayStatus`, `sessionCount`, `totalLicense`, and `licenseUsed`.
- **gateway-info-mib**\
Contains `licenseAlert` and `attackAlert`.
- **gateway-mib**\
Combined file that includes all the objects from the previous two.
You can load these MIB files into the SNMP manager as needed.
# 5.7 – SSH authentication with keys
To be able to authenticate to a created target system via SSH using public and private keys, the following steps must be followed, which will be described in more detail later:
1. Generate an SSH key
2. Copy the key to a server
3. Test the key
4. *Optional: convert private key to .pem format*
5. Include the key in SparkView
---
#### 1. Generate an SSH key
With OpenSSH, an SSH key is created using ssh-keygen. In the simplest form, just run ssh-keygen and answer the questions. The following example illustates this.
```
# ssh-keygen
Generating public/private rsa key pair.
Enter file in which to save the key (/home/sparkview/.ssh/id_rsa): mykey
Enter passphrase (empty for no passphrase):
Enter same passphrase again:
Your identification has been saved in mykey.
Your public key has been saved in mykey.pub.
The key fingerprint is: SHA256:GKW7yzA1J1qkr1Cr9MhUwAbHbF2NrIPEgZXeOUOz3Us sparkview@demo
The key's randomart image is:
+---[RSA 2048]----+
|.*++ o.o. |
|.+B + oo. |
| +++ *+. |
| .o.Oo.+E |
| ++B.S. |
| o * =. |
| + = o |
| + = = . |
| + o o |
+----[SHA256]-----+ #
```
Creating a key pair (public key and private key) only takes a minute. The key files are usually stored in the ~/.ssh directory.
#### 2. Copy the key to a server
Once an SSH key has been created, the `ssh-copy-id` command can be used to install it as an authorized key on the server. Once the key has been authorized for SSH, it grants access to the server without a password.
Use a command like the following to copy SSH key:
`ssh-copy-id -i ~/.ssh/mykey user@host`
This logs into the server host, and copies keys to the server, and configures them to grant access by adding them to the authorized_keys file. The copying may ask for a password or other authentication for the server.
Only the public key is copied to the server. The private key should never be copied to another machine.
#### 3. Test the key
Once the key has been copied, it is best to test it:
`ssh -i ~/.ssh/mykey user@host`
The login should now complete without asking for a password. Note, however, that the command might ask for the passphrase you specified for the key.
#### 4. Optional: convert private key to .pem format
If you do not have the private key in pem format and/or SparkView shows an error message like the following ...
```
SEVERE: Invalid PEM structure, '-----BEGIN...' missing
java.io.IOException: Invalid PEM structure, '-----BEGIN...' missing
at com.trilead.ssh2.crypto.PEMDecoder.parsePEM(SourceFile:183)
at com.trilead.ssh2.crypto.PEMDecoder.decode(SourceFile:429)
at com.trilead.ssh2.auth.AuthenticationManager.authenticatePublicKey(SourceFile:175)
at com.trilead.ssh2.Connection.authenticateWithPublicKey(SourceFile:335)
at com.trilead.ssh2.Connection.authenticateWithPublicKey(SourceFile:428)
at com.toremote.websocket.ssh.SSHWrapper.connect(SourceFile:109)
at com.toremote.websocket.ssh.SSHRunner.run(SourceFile:165)
```
... you should convert the private key to the correct format. To do this, you can run the following command:
`ssh-keygen -f mykey -m pem -p && cat mykey > mykey.pem`
You may need to re-enter the passphrase for the key. The command creates a pem version of the private key and then copies it to a key file named "mykey.pem".
#### 5. Include the key in SparkView
To finally use the key with SparkView, copy the previously created file "mykey.pem" into the root directory of SparkView. Then you enter the location of the key in the server configuration:
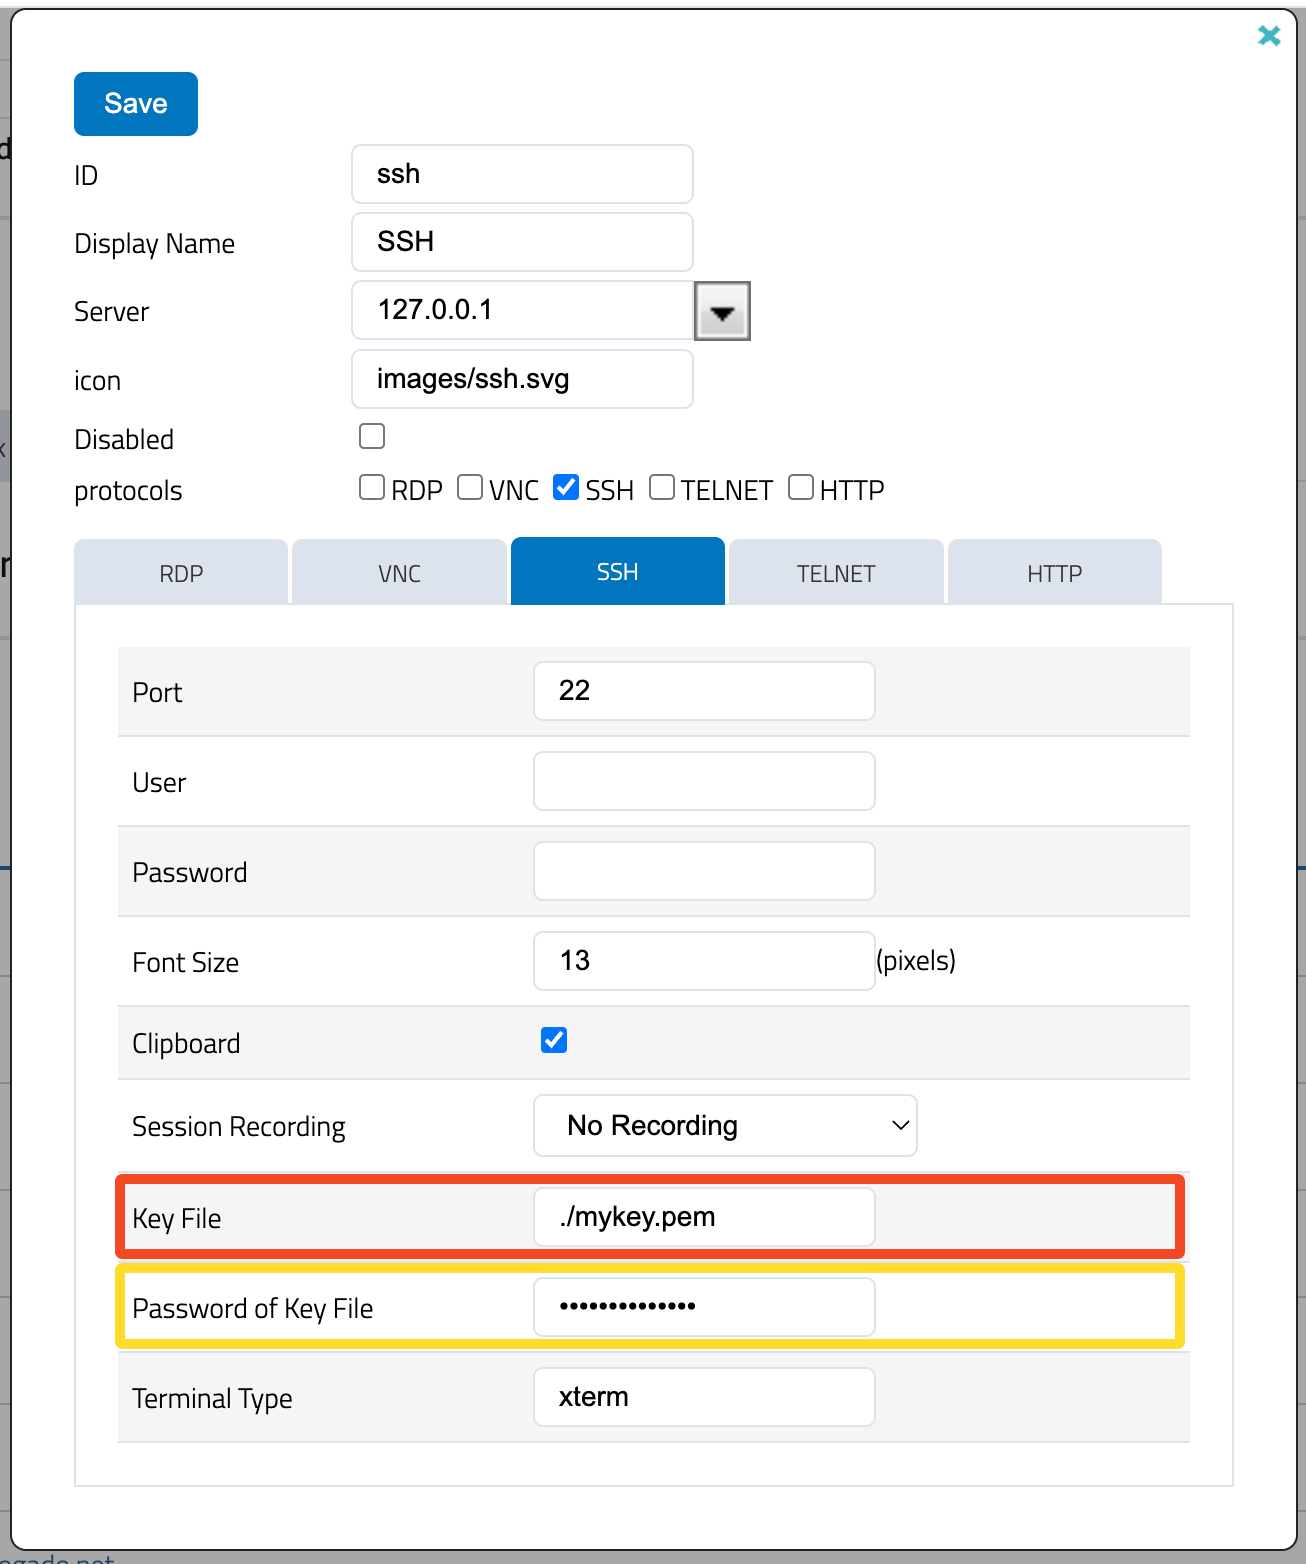
When you connect to the server afterwards, you only need to enter the SSH username and the connection will be authenticated and established automatically. Alternatively, you can forward the credentials from the user, but the SparkView user name and the SSH user name must be the same.